A Cyclist’s Guide for Optimal Safety and Comfort: Adjusting Fit on a Mountain Bike Helmet

Key Point Summary of Adjusting Fit on a Mountain Bike Helmet:
- Understanding Helmet Adjustment Mechanisms: Explore the various features like straps, ratchets, and pads that can be tweaked for a better fit.
- The Importance of a Proper Fit for Safety and Comfort: Learn why the right fit not only enhances safety but also improves overall cycling comfort.
- Step-by-Step Guide to Adjusting Your Helmet: Practical tips and tricks for achieving the perfect fit, based on my personal experiences.
As a masters cyclist who has spent years racing and riding across various disciplines – mountain biking, gravel grinding, and cyclocross – I’ve come to appreciate the nuances of proper gear adjustment, especially when it comes to helmets. For beginner to mid-level cyclists, understanding how to adjust your MTB helmet correctly is a game-changer for both safety and comfort. Let me share some insights and personal anecdotes that have helped me along the way.
Understanding Helmet Adjustment Mechanisms
Most modern mountain bike helmets come with a range of adjustment mechanisms. The primary ones include:
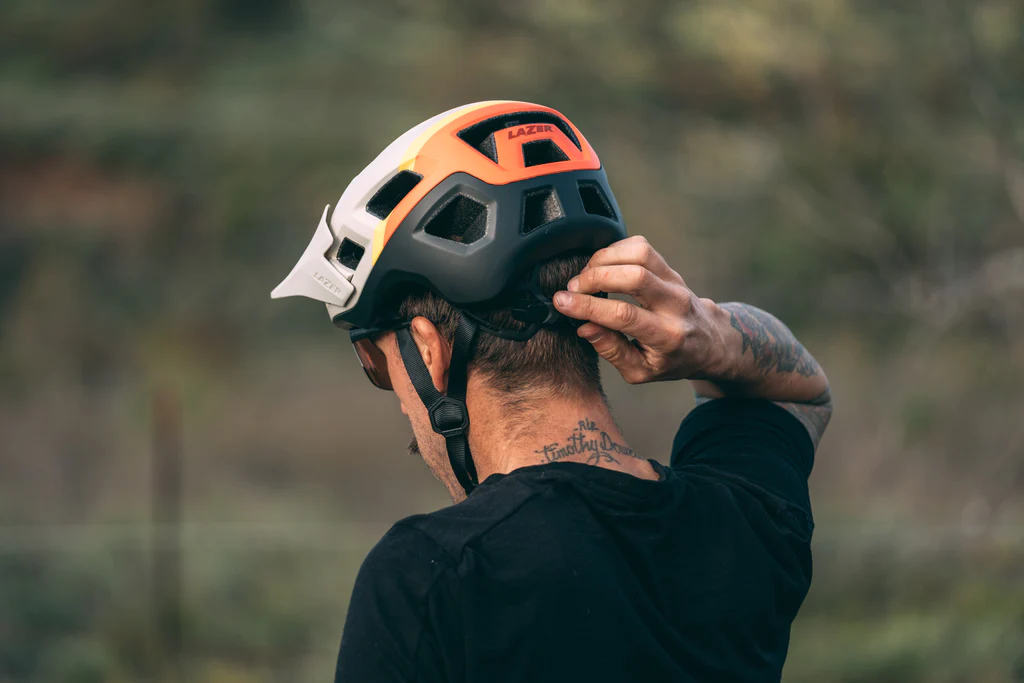
- Straps: These should form a ‘V’ shape around your ears and meet right below your earlobes.
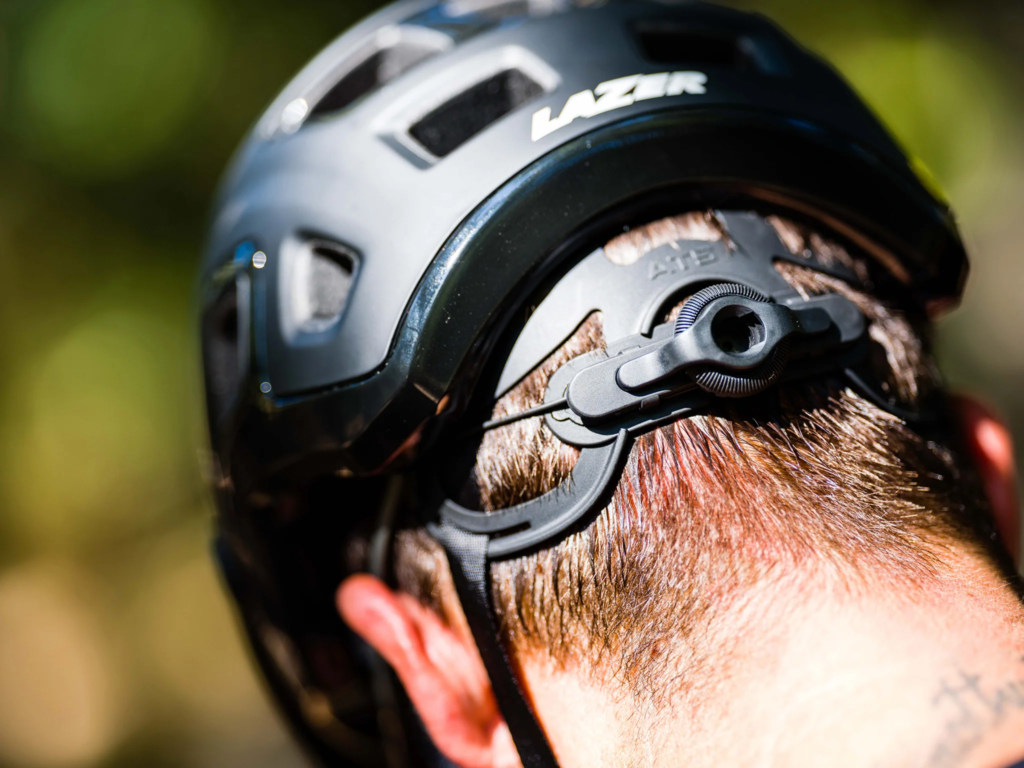
- Ratcheting System or Dial: Located at the back of the helmet, this helps tighten or loosen the fit around your head.
- Padding: Helmets come with interior pads, often in various thicknesses, to ensure a snug fit.
Remember the first time I adjusted a helmet with a ratcheting system? It was a revelation compared to the old-school straps-only models I started with. The ease of achieving a secure fit without the helmet feeling too tight was a significant upgrade in comfort.
The Importance of a Proper Fit for Safety and Comfort
A well-fitted helmet is paramount for safety. A loose helmet can easily come off during a crash, while one that’s too tight can be uncomfortable, distracting, and may even cause headaches. The right fit also means better ventilation, keeping you cooler and more focused on the ride.
I once had a helmet that was slightly too large. Despite my best efforts to adjust it, it would slip forward over my eyes on descents. After switching to a correctly sized helmet and adjusting it properly, not only did my field of vision improve, but I also felt more relaxed and in control on the trails.
As a prelude to this detailed guide, I previously authored an article titled How to Measure for a Bicycle Helmet. In that piece, I emphasized the importance of finding the perfect helmet size – a crucial first step before delving into adjustments. Understanding that a helmet’s fit is paramount to your safety and comfort while riding, I now bring you a comprehensive guide on how to adjust the fit of any helmet.
Measuring for the right helmet size is the foundation of helmet safety. A helmet that’s too large can slide off during a crash, while one that’s too small may not offer adequate protection. After ensuring you have the correct size, the next step is to fine-tune the fit. This process can be nuanced, involving adjustments to straps, padding, and retention systems to ensure the helmet sits snugly yet comfortably on your head.
In this guide, you’ll find detailed instructions and tips drawn from my personal experiences in cycling. Whether you’re a beginner or an intermediate rider, these insights will help you achieve a helmet fit that provides optimal protection and enhances your overall riding experience.
Stay tuned for practical, step-by-step advice on adjusting your helmet for the best possible fit. Let’s make sure your helmet is not just a piece of safety equipment, but a comfortable, well-fitting part of your cycling adventures.

Step-by-Step Guide to Adjusting Your Helmet
- Start with the Right Size: Before you adjust, make sure you have the correct size. It should sit snugly on your head without feeling overly tight.
- Adjust the Straps: Ensure the straps form a snug ‘V’ around each ear. They should meet just below your earlobes. Buckle the chin strap and tighten it until it’s comfortable under your chin – you should be able to fit only one or two fingers between the strap and your chin.
- Tighten the Ratcheting System: If your helmet has a dial or ratchet system at the back, tighten it until the helmet feels secure but not uncomfortably tight. The helmet should not move more than an inch in any direction.
- Check Padding Placement: Make sure the padding is evenly distributed and comfortable. You can usually rearrange or replace the pads to better suit your head shape.
- Field Test: Give your head a few shakes and bend forward and backward. The helmet should stay in place without sliding around.
An In-Depth Look at Adjusting the Fit of the Smith Mainline
Recognized as one of the premier manufacturers of mountain bike helmets, Smith Mainline consistently delivers both security and enjoyment for riders. Known for their attention to detail in safety and comfort, the Smith Mainline helmets boast numerous adjustable features to ensure a personalized fit for each rider. Of course, given their exceptional qualities, we have rated and ranked Smith Mainline helmets as one of the Best Bike Helmets in our comprehensive reviews. This distinction reflects their commitment to combining top-notch safety features with a level of comfort and adjustability that sets them apart in the world of mountain biking gear. In this piece, we’ll explore these features, highlighting how they contribute to a secure, comfortable, and tailored riding experience.
- Multiple Sizing Options: The inclusion of three sets of uniquely sized cheek pads, two sets of crown liners, and two neck rolls provides unparalleled customization. This variety allows each rider to achieve a fit that’s tailored to their individual head and face shape, which is crucial for both comfort and safety.
- Removable Components for Customization: The ability to easily remove components like cheek pads and liners not only facilitates cleaning but also permits riders to adjust or replace parts as needed. This flexibility is key for fine-tuning the fit over the helmet’s lifespan, accommodating changes in preference or wear.
- D-Ring Chin Strap Fastener: The use of a D-ring chin strap fastener, known for its reliability, ensures that the helmet remains securely in place, even during intense activity. This feature is essential for maintaining the helmet’s position and safety effectiveness, allowing for adjustments to achieve the perfect balance of security and comfort.
FAQ
How tight should a mountain bike helmet be?
A mountain bike helmet should be snug enough to stay securely in place, but not so tight that it causes discomfort or pressure points. Here’s a general guideline for ensuring the right tightness:
- Snug Fit: The helmet should sit firmly on your head. When you move your head quickly in any direction, the helmet should not wobble or slide. If it does, it’s too loose.
- V-Shaped Straps: The straps should form a V shape around each ear. They shouldn’t be too tight but should lie flat against your face.
- Chin Strap: When you buckle the chin strap, it should be snug against the underside of your chin. You should be able to fit only one or two fingers between the strap and your chin. If you can open your mouth wide with the chin strap fastened, and it doesn’t pull down on the top of your head, it’s a good sign that it’s tight enough.
- No Pressure Points: While the helmet should be snug, it shouldn’t cause headaches or pressure points. If you feel uncomfortable pressure, the helmet might be too tight or the wrong shape for your head.
- Even Pressure Distribution: The helmet should sit level on your head (not tilted back or too far forward) and should distribute pressure evenly around your head and face.
- Check Movement: Shake your head side to side and up and down. Your skin should move with the helmet, which indicates that it is snug enough.
A helmet that is too loose won’t provide adequate protection in a crash, while one that is too tight can be uncomfortable for long rides. Regularly checking the fit and readjusting as necessary is important for both safety and comfort.
How many fingers should you use when adjusting your helmet?
Typically, you should be able to fit one or two fingers under the chin strap of a properly adjusted helmet.
Should a bike helmet move on your head?
Nope! A properly fitted bike helmet should not move on your head. It should stay snug and in place.
Final Thoughts
Investing a few moments to correctly adjust your mountain bike helmet can have a significant impact. It’s not just about ensuring your safety; a well-adjusted helmet also elevates your riding experience, making it more enjoyable. It’s crucial to routinely verify your helmet’s fit, as straps and dials may move with use. Also, bear in mind the cardinal rule of helmet safety: if you’re involved in a crash, replace your helmet, regardless of its outward appearance. Prioritizing safety is paramount in every ride.
I hope this guide helps you find the perfect fit for your mountain bike helmet and enhances your riding adventures. Ride safely, enjoy every trail, and remember – your helmet is your best companion on the journey. Happy cycling!
John


