Adjusting Saddles for Gravel Bikepacking: A Master Cyclist’s Guide

Key Point Summary of Adjusting Saddles for Gravel Bikepacking:
- Importance of Saddle Position: Correct saddle height and tilt are crucial for comfort and pedaling efficiency.
- Adjusting Saddle Height: Finding the optimal saddle height to maximize power output and reduce strain.
- Saddle Tilt Adjustments: Slight adjustments to the saddle tilt can significantly impact comfort on long rides.
- Fore-Aft Position: Fine-tuning the saddle’s position to optimize body alignment and balance on the bike.
- Trial and Error: Personal experimentation is key to finding your perfect saddle setup.
Embarking on a gravel bikepacking trip is an adventure that combines the thrill of off-road riding with the joy of exploring new landscapes. However, the foundation of a great bikepacking experience lies not just in the gear you carry but in how your bike fits you—especially your saddle.
As a seasoned cyclist with years of experience across various cycling disciplines, including mountain biking, gravel riding, and cyclocross, I’ve learned the importance of proper saddle adjustment for ensuring comfort and efficiency on long rides. This article is crafted to guide beginner and mid-level cyclists through the nuances of adjusting saddles for gravel bikepacking, ensuring your journey is as enjoyable as it is adventurous.
The Foundation of Comfort: Saddle Position
The right saddle position is the cornerstone of a comfortable bikepacking experience. When you’re spending hours in the saddle over mixed terrain, even the slightest misalignment can lead to discomfort or injury. The goal is to achieve a saddle setup that allows for efficient power transfer while minimizing stress on the knees, back, and sit bones.

Height: The First Adjustment
The journey to the perfect saddle setup begins with adjusting the height. A saddle that’s too high can cause hip rocking and overextension at the bottom of the pedal stroke, leading to discomfort and reduced efficiency. Conversely, a saddle that’s too low can increase the strain on your knees. The ideal height allows for a slight bend in the knee when your foot is at the bottom of the pedal stroke.
The Angle of Comfort: Saddle Tilt
Saddle tilt plays a pivotal role in distributing your weight comfortably. A neutral tilt, where the saddle is level with the ground, is a good starting point. However, slight adjustments can be made based on personal preference and riding style. A slight downward tilt can relieve pressure on the soft tissues for some riders, while others may find a slight upward tilt helps maintain a stable position on steep climbs.

Optimizing Fore-Aft Position
The saddle’s fore-aft position affects your body’s alignment over the pedals, influencing both comfort and pedaling efficiency. The ideal position centers your weight evenly, allowing for a natural pedal stroke. This can be fine-tuned using the “knee over pedal spindle” (KOPS) method as a baseline, adjusting forward or backward to find the most comfortable position for your riding style.
The Role of Personal Experimentation
Finding the perfect saddle position is a personal journey. What works for one cyclist may not work for another, owing to differences in anatomy, flexibility, and riding preferences. Be prepared to experiment with slight adjustments over several rides, paying close attention to how changes affect your comfort and performance. Documenting these adjustments can be incredibly helpful in refining your setup.
Based on the criteria outlined for adjusting saddles for gravel bikepacking, focusing on comfort, efficiency, and the ability to withstand long distances on mixed terrain, here are some of the best gravel saddles that cater to these needs:
- WTB Volt: A versatile choice that suits a wide range of body shapes and riding styles, the Volt combines a supportive shape with a slight upward curve at the rear for stability and comfort on uneven terrain.
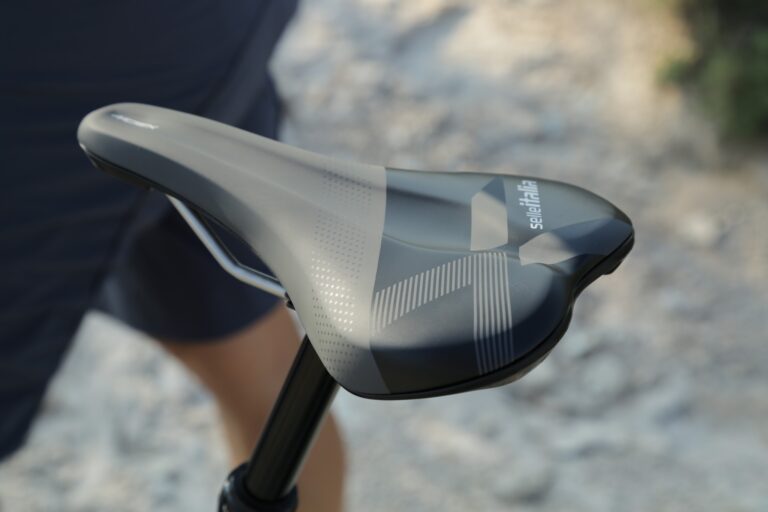
- Selle Italia SLR Boost Gravel Superflow: Designed specifically for gravel riding, it features a short nose, generous cutout for pressure relief, and a slightly wider rear for additional stability on rough roads.
- Fabric Scoop Pro Flat: Offers a flat profile for a more aggressive, forward position, with a flexible base and light foam padding for comfort over long distances.
- Specialized Power Comp with Mimic: Innovative for addressing soft tissue discomfort with its Mimic technology, this saddle is designed to adapt to the body to reduce pressure and enhance blood flow on long rides.
These saddles are selected for their features that enhance the gravel bikepacking experience, such as comfort over long distances, durability against the elements, and designs that support efficient pedaling dynamics. When choosing a saddle, consider your personal anatomy, riding style, and the type of gravel riding you’ll be doing to ensure the best fit and experience.
Ensuring a Successful Bikepacking Experience
The right saddle adjustment is crucial for a successful gravel bikepacking trip. It ensures that you can focus on the adventure ahead, rather than being distracted by discomfort. Remember to consider all aspects of saddle adjustment—height, tilt, and fore-aft position—and be willing to make incremental changes as you dial in your perfect setup.
In preparation for a bikepacking adventure, it’s also wise to test your saddle setup on long training rides that mimic the conditions of your upcoming trip. This not only helps you fine-tune your saddle position but also allows you to assess the overall comfort and functionality of your bikepacking setup.

FAQ
What is the correct saddle setting for cycling?
The correct saddle setting positions you so that when the pedal is at its lowest point, your knee has a slight bend (about 25-30 degrees). The saddle should be level or slightly tilted to accommodate personal comfort, ensuring efficient pedaling and minimizing discomfort.
Should I tilt my saddle down?
A slight downward tilt (no more than a few degrees) can be comfortable for some cyclists, reducing pressure on soft tissues. However, too much tilt can cause you to slide forward, increasing pressure on your arms and shoulders. Adjust carefully based on personal comfort and riding style.
What height should gravel bike handlebars be?
Gravel bike handlebars are typically set at or slightly below the saddle height for a comfortable, endurance-oriented position. The exact height can vary based on personal comfort, flexibility, and the type of riding you’re doing. Adjusting the height for a balance of comfort and control is key.
How high should my gravel bike seat be?
Your gravel bike seat should be high enough so that when the pedal is at its lowest point, your leg is almost fully extended with a slight bend in the knee. This optimizes pedaling efficiency and helps prevent knee strain. Adjustments should be made to ensure there’s no rocking of the hips while pedaling.
Wrapping Up
Adjusting your saddle for gravel bikepacking is a critical step in preparing for your journey. By taking the time to find your optimal saddle position, you can enhance your riding comfort, improve pedaling efficiency, and prevent injuries, ensuring that your bikepacking adventure is memorable for all the right reasons. Remember, the key to a perfect saddle setup lies in personalization and patience, allowing you to explore the great outdoors with confidence and comfort.
John