How to Repair a Road Bike Helmet: A Cyclist’s DIY Guide

Key Point Summary of How to Repair a Road Bike Helmet:
- Helmet Assessment: Regularly inspect for damage. If there’s structural damage, especially after a crash, it’s safer to replace the helmet.
- Strap Adjustments: Loose or frayed straps can often be tightened or replaced. Check the manufacturer’s guidelines for specific instructions.
- Padding Replacement: Worn or degraded padding can usually be replaced. Many helmet brands offer replacement kits.
- Shell Repairs: Minor scratches can be touched up with appropriate paint, but deep cracks or significant damage often require a new helmet.
- Regular Cleaning: Use mild soap and water for cleaning. Avoid harsh chemicals that can compromise helmet materials.
- Safety First: Always prioritize safety. If unsure about the helmet’s integrity after attempting a repair, consult a professional or opt for a replacement.
As a masters cyclist with experience across various biking disciplines, I understand the importance of helmet maintenance and basic DIY repairs. This guide is designed to help beginner and mid-level cyclists navigate the essentials of road bike helmet care.
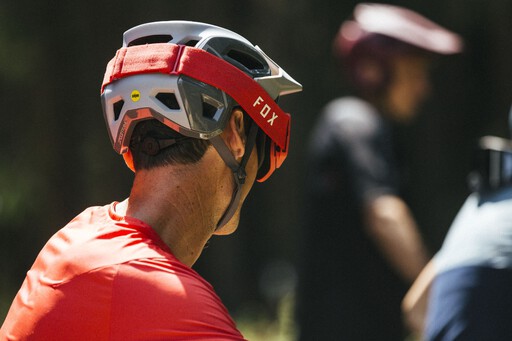
Understanding Helmet Structure
Familiarize yourself with your helmet’s components – shell, foam, straps, and adjusters. Knowing these helps in effective maintenance and minor repairs.
Assessing Helmet Damage
Check for cracks, dents, or significant wear. Structural damage, especially after an impact, often warrants helmet replacement for safety.
DIY Helmet Fixes
- Strap Adjustments: Tighten or replace straps if loose or frayed.
- Padding Replacement: Remove old padding and replace it with new ones available from the helmet manufacturer.
- Minor Shell Repair: For superficial scratches, use specific paints or adhesives compatible with the helmet material.
Helmet Maintenance
Regularly clean your helmet with mild soap and water. Avoid harsh chemicals that can degrade helmet materials. Check for loose components and tighten them.
Replacing Parts
Purchase replacement parts like buckles or visors from the helmet manufacturer or authorized dealers. Ensure compatibility with your helmet model.

Safety First
Always prioritize safety over aesthetics. If unsure about the helmet’s integrity, consult with a professional or consider a replacement.
Regular Inspections
In addition to assessing for damage, regular inspections of all helmet components can prevent small issues from becoming major problems. This includes checking the fit system, looking for any loose parts, and ensuring the helmet’s stability on your head.
Moisture Management
After rides, especially in wet conditions or after sweating heavily, airing out the helmet helps prevent the degradation of materials.
Visor Maintenance
For helmets with visors, regularly check and tighten the visor screws. Replace the visor if it’s cracked or broken.
Up-to-Date Safety Standards
Stay informed about current safety standards and regulations for bike helmets. This knowledge can guide you in both maintaining your current helmet and making informed choices when purchasing a new one.
Wrapping Up
For a robust construction in road bike helmets, several models stand out:
- Smith Network Cycling Helmet: Known for its lightweight design, advanced safety features like Koroyd and MIPS, good airflow, and compatibility with Smith performance eyewear.
- Lazer Z1 Helmet: This helmet is celebrated for its lightweight design and superior ventilation system. It includes an advanced Rollsys fit system, ensuring a secure and comfortable fit.
- Specialized S-Works Prevail II: Known for its ultralight construction and enhanced ventilation, this helmet is a favorite among road cyclists for its balance of safety and comfort.
- Specialized Propero III: This model is praised for its competitive performance, offering an excellent fit with its HairPort FSL II fit system and cooling efficiency with its 4th Dimension Cooling System.
These helmets are recognized for their combination of safety, comfort, and durability, making them suitable choices for road cyclists.
Maintaining and repairing a road bike helmet is crucial for safety. While some repairs can be done at home, always assess the damage carefully. When in doubt, replacing the helmet is the safest choice. Regular maintenance can extend the life of your helmet, keeping you safe on your rides.
John

Can bike helmets be repaired?
Bike helmets can be repaired for minor issues such as replacing the straps, and padding, or adjusting the fit system. However, if a helmet has sustained structural damage, especially from an impact, it is not safe to repair and should be replaced to ensure optimal protection.
What is the best glue for bike helmet?
For minor repairs on a bike helmet, such as reattaching loose parts, a strong adhesive like cyanoacrylate (commonly known as super glue) can be effective. However, it’s crucial to ensure that the glue does not compromise the structural integrity of the helmet or react negatively with the helmet materials. Always check the manufacturer’s recommendations or consult a professional before applying any glue to a bike helmet. For structural repairs, it’s generally safer to replace the helmet.
What is the lifespan of a bike helmet?
The lifespan of a bike helmet is typically around 3 to 5 years. However, it should be replaced sooner if it has been involved in a crash, shows signs of significant wear, or if the materials (like the straps or foam) have degraded. Regular inspections are important to assess its condition.
How do you put a clip back on a helmet?
To put a clip back on a bike helmet, first align the clip with the slots or grooves where it originally fit. Gently press the clip back into place until it snaps securely. If it’s a buckle or strap clip, ensure that it’s facing the correct direction for ease of use. If the clip doesn’t snap back in easily or seems damaged, it may need to be replaced instead of repaired. Always check the helmet’s fit and security after reattaching any parts to ensure safety.