Trail Comfort: The Ultimate Mountain Bike Saddle Fitting Guide

Key Point Summary of Mountain Bike Saddle Fitting Guide:
- Essentials of Saddle Fitting for Mountain Biking: Key aspects of saddle fitting tailored for mountain biking.
- Personal Experiences with Saddle Fitting: My journey in finding the perfect saddle fit for diverse terrain.
- Guiding Cyclists on Proper Saddle Fit: Practical advice for beginner and mid-level cyclists to achieve optimal riding comfort.
As a master cyclist with experience in mountain biking, gravel biking, and cyclocross, I’ve come to realize how crucial a properly fitted saddle is to the overall biking experience. Saddle fitting for mountain bikes is slightly different than for other types of bikes due to the varied and often rough terrain involved.
Understanding the Essentials of Mountain Bike Saddle Fitting
Mountain bike saddle fitting involves several key aspects: the saddle’s width, shape, padding, and position. The width should match your sit bone measurement, ensuring that your weight is supported correctly. The shape and amount of padding should correspond to your riding style and comfort needs.
Saddle Positioning
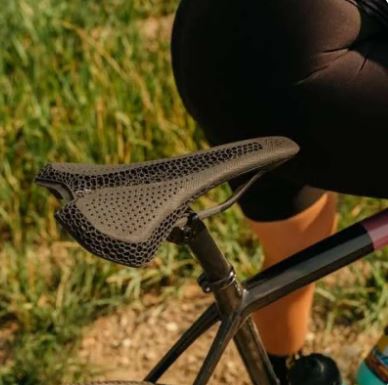
The saddle’s position is critical. It should allow for efficient pedaling while offering comfort during climbs and descents. A slightly tilted nose can help on steep climbs, but too much tilt can cause discomfort.
Personal Journey in Saddle Fitting
I learned the importance of saddle fitting early in my mountain biking career. A poorly fitted saddle led to discomfort and inefficiency on the trails. Through experimentation, I found that a slightly wider saddle with medium padding suited my riding style best, offering support during long climbs and cushioning on rough descents.
Tips for Proper Saddle Fitting
- Sit Bone Measurement: Start by measuring your sit bones to find the right saddle width.
- Consider Saddle Shape: Flat saddles offer more movement, while curved ones provide more support.
- Padding and Material: Choose a saddle with padding that suits your comfort needs and riding frequency.
- Adjust Saddle Height and Angle: Fine-tune the saddle height so that your leg is almost fully extended at the bottom of the pedal stroke. Adjust the angle for comfort and control.
- Test Rides: Always test your saddle on a ride. What feels good in the shop may feel different on the trail.
Based on recent reviews and expert opinions, some of the best mountain bike saddles for 2024 include models known for their comfort, support, and durability, catering to various riding styles and preferences.
- SDG Bel-Air 3.0: Praised for its support, overall shape, and style, the Bel-Air 3.0 is a well-regarded saddle in the mountain biking community.
- DMR Stage 2 MTB Rail: This saddle is recognized for its value, featuring a stress-relieving central channel, harder-wearing side panels, and a design that helps keep you centered without sliding around.
- SQ Labs Infinergy Ergowave 60X: Known for reducing numbness, this saddle has a unique foam material and a distinctive shape that prevents sliding forward, with a flat nose and a deep central channel for pressure relief.
- Fabric Scoop Elite: A great value and aesthetically pleasing saddle, the Fabric Scoop Elite is appreciated for its comfy padding, flexible base, and suitability for a broad range of riders.
- WTB Volt Race: This classic comfort saddle is great for all-day riding and comes in various widths, offering plenty of cushioning and an inherently comfortable feel.
- Ergon SM Enduro Comp: Ideal for long rides, this saddle features a shape that’s comfortable and supportive, with a deep central channel for pressure relief and a kicked-up tail for climbing stability.
Each of these saddles brings unique features to the table, such as comfort, support, and a design that caters to different mountain biking needs. When choosing a saddle, consider factors like the type of riding you do, your comfort preferences, and the saddle’s design features that match your riding style
Final Thoughts
Finding the right saddle fit for your mountain bike can significantly enhance your riding experience. It’s a blend of personal preference, comfort, and efficiency. As a cyclist who has tackled various terrains, I encourage you to invest time in finding a saddle that suits your needs. The right fit is key to enjoying your rides to the fullest.
John
FAQ
How should my mountain bike seat be positioned?
Your mountain bike seat should be positioned to balance comfort, efficiency, and control:
- Height: Adjust the seat height so that when you’re seated and your foot is at the bottom of the pedal stroke, your knee is slightly bent. This helps ensure efficient pedaling without overextending your leg.
- Angle: Generally, the seat should be level, but slight adjustments can be made for comfort. Tilting it too far forward or backward can cause discomfort and inefficiency in pedaling.
- Fore-Aft Position: Align the seat so that when the pedals are level, your knee is directly over the pedal axle. This positioning helps with proper leg movement and balance while riding.
Remember, these are starting points. Fine-tuning these adjustments based on personal comfort and the type of riding you do is key to finding the best position. Here’s another superb tip from GMBN Tech.
How do you size a mountain bike saddle?
To size a mountain bike saddle, measure the distance between your sit bones and choose a saddle width that offers support for these bones. Typically, bike shops have tools for sit bone measurement. The saddle should be wide enough to comfortably support your sit bones without being so wide that it causes chafing or restricts thigh movement. It’s important to consider your riding style and position, as more aggressive riding styles might benefit from a narrower saddle, while more upright positions may require a wider saddle for comfort.
What is the best saddle angle for MTB?
The best saddle angle for mountain biking generally involves a slightly downward tilt at the front, aiming for about 1-3 degrees. This angle helps to reduce pressure on sensitive areas and can aid in comfort, especially on longer rides. However, the ideal angle can vary based on personal preference and riding style. Too much tilt can cause you to slide forward and put undue pressure on your arms and shoulders, so it’s important to find a balance that feels comfortable and allows for efficient pedaling. Experimenting with small adjustments and testing them out on rides is the best way to find the angle that works best for you.
