Adjusting Your Gravel Bike Helmet for Perfect Fit: A Guide for Beginner to Mid-Level Cyclists

Key Point Summary of Adjusting Your Gravel Bike Helmet for Perfect Fit:
- Understanding Helmet Structure and Fit: Learn about the essential parts of a gravel bike helmet and how they should fit your head.
- Step-by-Step Adjustment Guide: Follow simple steps to ensure your helmet is properly adjusted for safety and comfort.
- Personal Insights and Tips: Benefit from the experience of a master cyclist with anecdotes and advice for cycling enthusiasts.
As a master cyclist with a rich history of racing and riding across various terrains – including mountain, gravel, and cyclocross – I’ve learned a thing or two about the importance of a well-fitted helmet. Adjusting gravel helmets for optimal fit is not just about comfort; it’s a critical safety measure every cyclist, from beginner to mid-level, should prioritize. Here’s my guide, sprinkled with personal anecdotes, to help you get that perfect helmet fit.
Understanding Helmet Structure and Fit
Before diving into the adjustment process, it’s crucial to understand your helmet’s structure. A typical gravel bike helmet consists of a hard outer shell, EPS foam liner, retention system, and straps. The outer shell resists impacts, while the EPS liner absorbs shock. The retention system and straps keep the helmet securely in place.
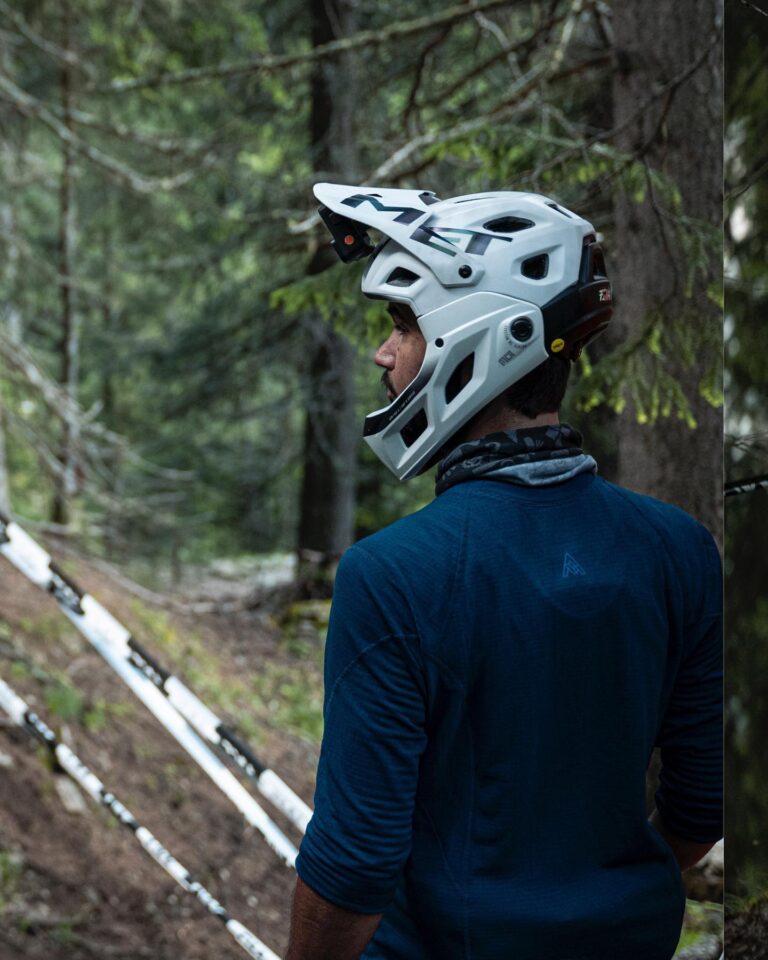
Fit is paramount. The helmet should sit level on your head, covering most of your forehead and not tilted back. There should be minimal movement when you shake your head. Remember, a loose helmet is as good as no helmet in an accident.
Step-by-Step Adjustment Guide
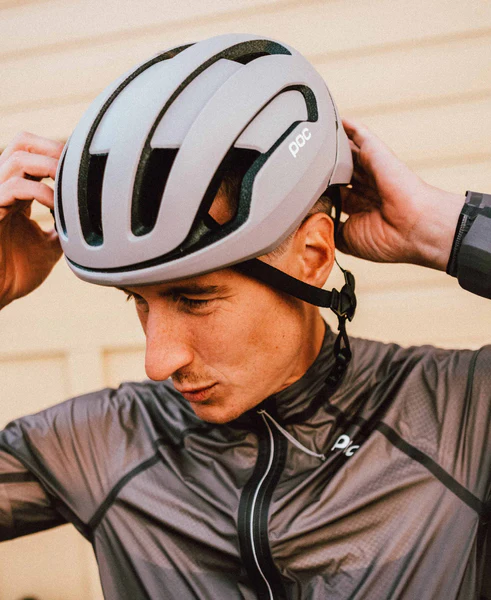
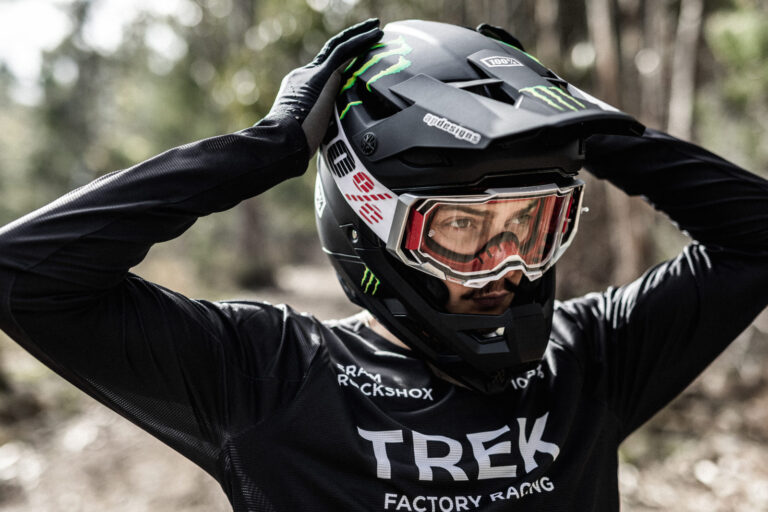
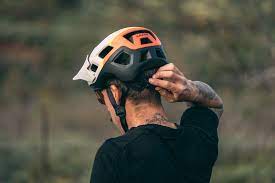
1. Start with the Size: Always begin by selecting a helmet that fits your head size. Sizes vary between manufacturers, so try different ones. The helmet should feel snug but not uncomfortably tight.
2. Adjust the Retention System: Most modern helmets have a dial at the back. Tighten or loosen it for a secure, snug fit. This system prevents the helmet from moving around while you’re riding.
3. Position the Helmet Correctly: The helmet should sit about an inch above your eyebrows. A common mistake is wearing it too high or too low, compromising protection and visibility.
4. Adjust the Straps: The side straps should form a ‘V’ shape under and slightly in front of your ears. Buckle the chin strap, ensuring it’s snug but not choking you. You should be able to fit only one or two fingers between the strap and your chin.
5. The Final Check: Give your head a good shake. The helmet should stay put without sliding in any direction.
Personal Insights and Tips
In my early days of gravel biking, I underestimated the importance of a properly fitted helmet. It wasn’t until a minor fall, where my loosely fitted helmet came off, that I realized its significance. A correctly adjusted helmet would have stayed in place, offering much-needed protection.
Tip for Long Rides: During long rides, you might need to readjust your helmet as your body warms up and you get more comfortable. Always stop to make these adjustments.
Dealing with Hair: If you have long hair, consider how it might affect your helmet’s fit. Some cyclists prefer a low ponytail or braids to avoid discomfort.
Regular Checks: Regularly inspect your helmet for wear and tear. If you’ve had a fall, even if the helmet seems fine, it’s safer to replace it. The structural integrity might be compromised.
Gender-Specific Tips for Fitting a Gravel Bike Helmet: Ensuring Comfort and Safety for Men and Women


Women’s Helmet Fitting Tips
For women cyclists, finding the right helmet fit involves considering unique factors such as hair management and head size. Women’s helmets are often designed with these considerations in mind, offering comfort without compromising on safety. Let’s explore some key tips to help women achieve the best possible helmet fit.
1. Hair Considerations: Many women cyclists have to factor in their hairstyle when fitting a helmet. Long hair, especially if it’s thick, can alter how a helmet sits on the head. Low ponytails, braids, or buns are often preferable. Some helmets come with a hair port, and a gap at the back for ponytails.
2. Smaller Sizes: Generally, women may have smaller head sizes compared to men. It’s important to try on various sizes and choose a helmet that doesn’t wobble or press into the scalp uncomfortably. Women-specific helmets are designed to accommodate smaller head sizes and different hair types.
3. Adjusting the Straps: The straps should not interfere with earrings or other hair accessories. Ensure that the helmet’s side straps form a ‘V’ under and slightly in front of the ears without pinching.
4. Comfort and Security: The helmet should feel secure but not too tight. It should sit level on the head and not slide back and forth. A snug, but comfortable chin strap is key to keeping the helmet in place.
Men’s Helmet Fitting Tips
Men’s helmet fitting, while similar in fundamental safety aspects, also demands attention to specific details such as head shape and size. A helmet that fits well for men is crucial for effective protection and comfort, especially during extended rides. Here are some essential tips to guide men in choosing and adjusting their helmets correctly.
1. Head Shape and Size: Men often have larger head sizes, and some have more elongated head shapes. It’s crucial to select a helmet that matches your head shape for optimum comfort and safety.
2. Strap Adjustments: Adjust the chin and side straps to ensure the helmet remains stable during rides. The helmet should sit squarely on the head with the front edge about an inch above the eyebrows.
3. Hair Considerations: While men typically don’t have the same hair considerations as women, those with longer hair or beards should ensure that these don’t affect the helmet’s fit.
4. Checking for Gaps: There should be no significant gaps between the helmet and the head. The internal padding should be in contact with the head all around.
FAQ
What is the helmet fitting rule?
The helmet fitting rule, often referred to as the “2V1 Rule” or the “Eyes, Ears, and Mouth test,” is a simple guideline to ensure that a bike helmet is fitted correctly for optimal safety and comfort. It involves three key steps:
- Eyes: When you put your helmet on, there should be about two fingers’ width of space between your eyebrows and the helmet. This ensures that the helmet is not sitting too high or too low on your head.
- Ears: The straps of the helmet should form a “V” shape around each ear. This means that the straps come together just below the earlobe to create a secure fit that keeps the helmet properly positioned.
- Mouth: When the helmet is strapped on, you should be able to open your mouth wide enough to fit one or two fingers between the chin strap and your chin. The strap should be snug against your chin to prevent the helmet from moving but not so tight that it’s uncomfortable.
This rule is a quick and easy way to check the fit of a bike helmet, ensuring it provides the maximum level of protection and comfort. It’s important to adjust the fit of your helmet regularly, especially if you change your hairstyle or if the helmet straps or padding have settled over time.
If you’re keen to visually understand how to apply this rule, we found a wonderful YouTube video from BikeSafe that demonstrates these steps clearly. Watching this video can help you get a better grasp of what we mean and ensure that your helmet is fitted correctly for your next ride.
How do I know if my helmet is too small?
Knowing whether your helmet is too small is crucial for both comfort and safety. Here are some signs to look out for:
- Pressure Points: If you feel uncomfortable pressure points on your head after wearing the helmet for a few minutes, it’s likely too small. These pressure points often manifest as headaches or sore spots on the head.
- Difficulty Putting It On or Taking It Off: If you struggle to put on or remove the helmet, it might be too small. A properly sized helmet should slide on and off your head without excessive resistance.
- Overly Tight Straps: If the helmet’s straps can’t comfortably reach or fasten beneath your chin without stretching them to their limits, the helmet is probably too small.
- Inadequate Coverage: A helmet that is too small may not cover your head adequately. It should sit level, about one or two finger-widths above your eyebrows, and should cover the top of your forehead and the back of your head.
- Uncomfortable or Tight Fit: If the helmet feels uncomfortably or excessively tight all around, it’s too small. While it should be snug, it shouldn’t cause discomfort or leave deep marks on your skin.
- Limited Movement: If you can’t open your mouth fully, chew, or talk comfortably due to the helmet’s chin strap or structure, it’s a sign that it’s too small.
A helmet that’s too small can compromise safety by not providing enough protection and can be uncomfortable, leading to distractions while riding. If you’re experiencing these issues, it’s advisable to try a larger size or a different model that better fits your head shape. To help you get started, we have watched, rated, and ranked the Best Bike Helmets. Inside, you will find more than 200 reviews of bike helmets, tailored to various riding needs, including gravel biking.
How do I know if my helmet is too big?
Determining if your helmet is too big is important for your safety and comfort while cycling. Here are key indicators that your helmet might be too large:
- Excessive Movement: If the helmet shifts or rotates significantly on your head with little effort, it’s likely too big. A properly fitting helmet should remain stable and only move slightly when you shake your head.
- Poor Fit Even After Adjusting Straps: After tightening the straps, if the helmet still feels loose or wobbly, it’s probably too large. The straps should help secure the helmet, but they can’t compensate for an overall poor fit.
- Gaps Between Head and Helmet: Feel for gaps between your head and the helmet padding. A helmet that’s too big will have noticeable spaces where it doesn’t make contact with your head.
- Helmet Sits Too Low or Too High: If the helmet can be easily pushed down too far on your head or if it sits too high even when straps are adjusted, it’s a sign that it’s too big.
- Chin Strap Doesn’t Stay Put: If the chin strap needs to be overly tightened to feel secure, or if it slips easily, this could indicate that the helmet is too large.
- Lack of Secure Feeling: A helmet that’s too big often lacks the secure, snug feeling that’s essential for proper protection. If you don’t feel that the helmet is adequately safeguarding you, it’s likely too large.
A helmet that’s too big can fail to provide adequate protection in the event of a crash. It’s essential to have a helmet that fits correctly, so if you’re experiencing these issues, consider trying a smaller size or a different model that better suits your head shape.
Final Thoughts
Adjusting your gravel bike helmet might seem like a small task, but it’s a crucial one for both your comfort and safety. As you gain more experience cycling, you’ll come to appreciate the nuances of a well-fitted helmet. Every ride is an opportunity to learn and grow in this wonderful sport of cycling.
Stay safe and enjoy the ride!
John