Mastering Comfort: Adjusting Your Hydration Pack Perfectly

Key Point Summary of Adjusting Your Hydration Pack Perfectly:
- Essentials of Adjusting Hydration Pack: Discover the basics of adjusting hydration pack for a snug and comfortable fit.
- Tailoring for Comfortable Cycling: Learn how to adjust your hydration pack to enhance comfort and performance while cycling.
- Pack Fitting Techniques: Master the techniques of pack fitting to ensure your rides are enjoyable and free from discomfort.
As a seasoned cyclist who has tackled various terrains on mountain bikes, gravel bikes, and cyclocross bikes, I’ve come to appreciate the importance of a well-adjusted hydration pack. It’s not just about having water readily available; it’s about merging comfort with functionality. This guide is for my fellow cyclists, whether you’re just starting or have been riding for a while but haven’t quite nailed the perfect pack fit. Let’s dive into the world of adjusting hydration packs, with some personal anecdotes and tips that have served me well over the years.
Essentials of Adjusting Hydration Packs
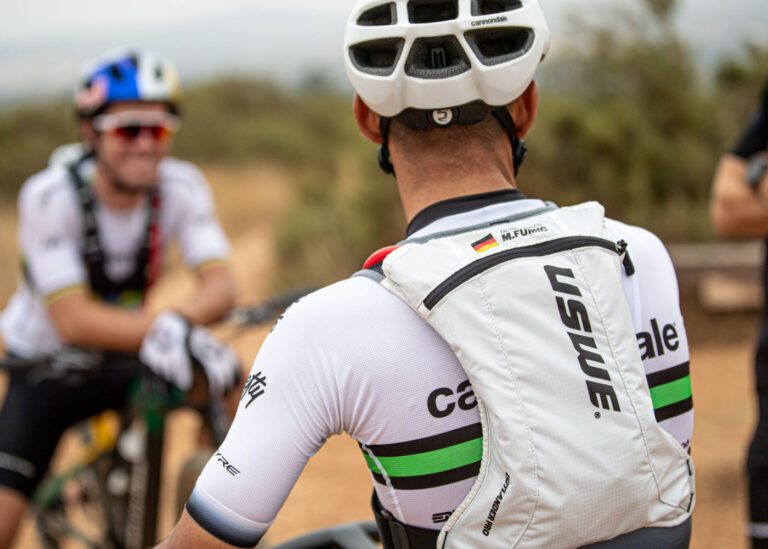
Start with the Right Size: Before adjusting, make sure your hydration pack is the right size for your body. I learned this the hard way during an endurance race where my oversized pack kept sliding, causing discomfort and distraction. A pack that’s too large or too small can throw off your balance and reduce comfort.
Adjust the Shoulder Straps: The shoulder straps should sit comfortably on your shoulders without digging in or being too loose. I remember adjusting mine on a rocky trail ride. The pack kept bouncing on my back until I tightened the straps just enough to hold it steady without restricting my breathing.
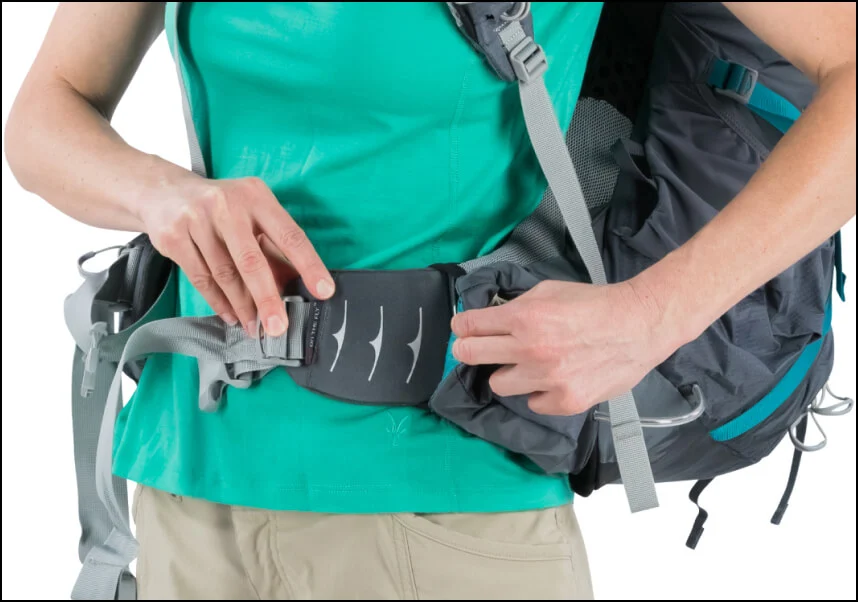
The Importance of the Chest Strap: A well-positioned chest strap can make a world of difference. It should sit about an inch below your collarbone. This strap is a game-changer for stability, especially when you’re maneuvering through technical terrain.
Tailoring for Comfortable Cycling
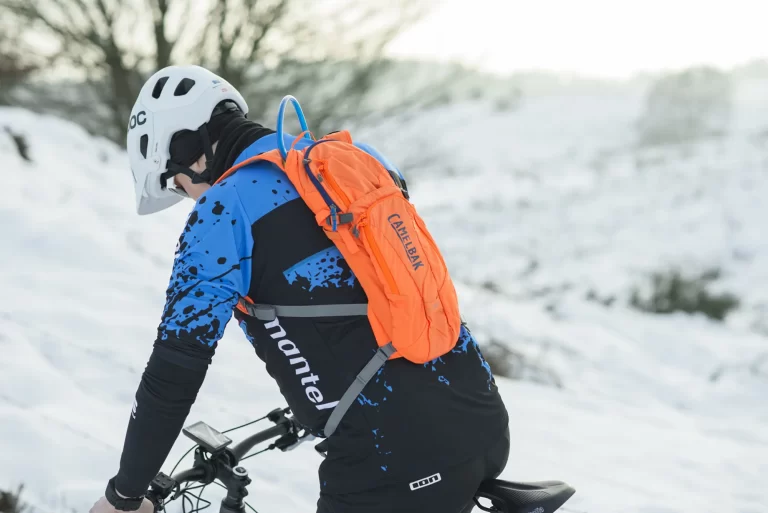
Waist Strap Adjustment: If your pack has a waist strap, use it to take some weight off your shoulders. On a long gravel ride, adjusting my waist strap reduced the strain on my shoulders significantly, making the ride much more enjoyable.
Balance the Load: Distribute the weight evenly. Keep heavier items close to your back and centered. During a cyclocross race, I had unevenly packed my tools on one side, which threw off my balance on tight turns.
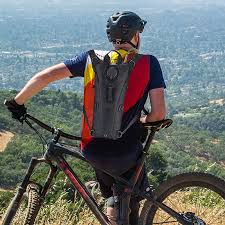
Room for Movement: Ensure your pack allows for a full range of motion. Especially when you’re out of the saddle, climbing steep hills, or navigating descents, your pack shouldn’t restrict your movement.
Pack Fitting Techniques
Fine-Tuning on the Go: Don’t be afraid to adjust your pack mid-ride. Conditions change, and what felt comfortable at the start may not be ideal a few hours in. I’ve stopped mid-climb before to adjust my straps for better comfort.
Hydration Hose Positioning: The hose should be easily accessible. I route mine along the shoulder strap and secure it with clips or velcro straps. There’s nothing more frustrating than a hose that keeps swinging out of reach.
Consider Pack Load for Different Rides: Adjust your pack differently for varying ride types. For a bumpy mountain bike ride, I secure my pack more snugly to prevent bouncing. For a leisurely ride on my gravel bike, I opt for a looser fit for comfort.
Adjusting your hydration pack is not a one-time task. It’s an ongoing process that depends on the ride, the gear you carry, and your personal comfort. A well-adjusted pack not only improves your performance but also enhances your overall cycling experience. So, take the time to fine-tune your hydration pack before and during your rides. It might just be the key to your best ride yet.
FAQ
How do you shorten a hydration pack tube?
Shortening a hydration pack tube can be a straightforward process, but it requires careful handling to ensure a proper fit and to avoid leaks. Here’s a step-by-step guide:
- Measure and Mark:
- First, determine the desired length of the tube. Wear your hydration pack as you would during an activity and check where you would like the mouthpiece to be.
- Mark the tube at the point where you want to cut it. It’s better to be conservative at first – you can always trim more off later if needed.
- Remove the Tube from the Reservoir:
- Disconnect the tube from the hydration bladder. Most tubes can be easily detached by pulling them off the connector.
- Also, remove the bite valve or mouthpiece at the other end of the tube.
- Cut the Tube:
- Use a sharp pair of scissors or a tube cutter to make a clean, straight cut where you marked the tube.
- Be sure to cut as straight as possible to ensure a good seal when you reattach it.
- Reattach the Tube:
- After cutting, reattach the tube to the bladder. Push it firmly onto the connector to ensure it’s secure and won’t leak.
- Reattach the bite valve or mouthpiece to the newly cut end of the tube.
- Check for Leaks:
- Before using it on a ride or hike, fill the bladder with water and check for any leaks at both ends of the tube.
- Test by taking a few sips through the bite valve to ensure the flow is unimpeded and the connections are secure.
- Adjust if Necessary:
- If the tube is still too long, repeat the process, trimming a little bit more until you reach the desired length.
- If you accidentally cut the tube too short, you may need to purchase a replacement tube.
Cutting the tube permanently alters your hydration pack, so measure twice and cut once. Proper fitting and a comfortable reach to the mouthpiece can greatly enhance your hydration experience during outdoor activities.
Why won’t water come out of the hydration pack?
If water isn’t coming out of your hydration pack, there could be several reasons. Here are some common issues and how to troubleshoot them:
- Bite Valve is Closed or Damaged: Ensure the bite valve is open, as some have a twist mechanism for opening and closing. Also, inspect the valve for any signs of damage or wear that could be causing a leak or blockage.
- Tube is Kinked or Twisted: Check the tube for kinks or severe bends that could restrict water flow. Straighten any twisted or bent sections to restore proper flow.
- Air Blockage in the Tube: Air trapped in the tube can hinder water flow. Gently squeezing the bite valve or sucking on it can help release any air pockets.
If none of these troubleshooting steps resolve the issue, it might be time to consult the manufacturer’s customer service or consider getting a replacement.
How tight should a hydration pack be?
A hydration pack should be snug enough to stay stable without restricting movement or breathing.
How do I get my hydration pack to work?
Fill the bladder, remove air, ensure the bite valve is open, and check that the hose is properly connected.
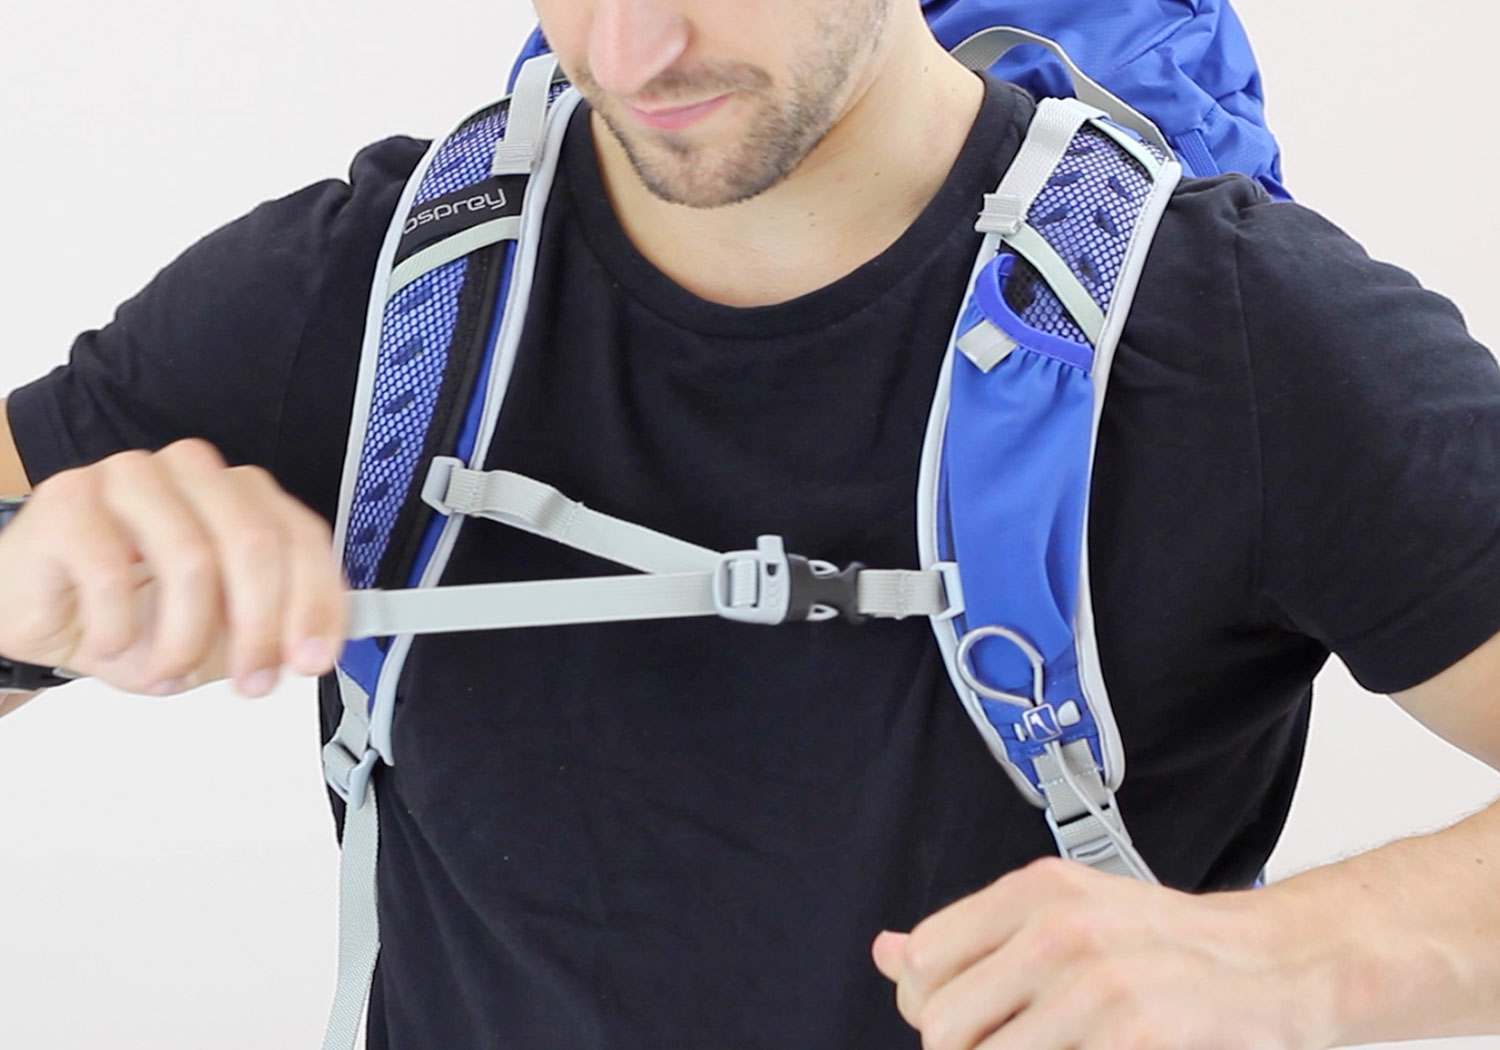
Additionally, this informative article from Osprey Packs provides thorough instructions on backpack fitting. It underscores the critical role of a proper fit for both comfort and efficiency, especially in outdoor pursuits such as trekking. The piece details key steps for adjusting the backpack, which include determining the correct torso length, correctly positioning and securing the hip belt, and fine-tuning the harness straps and load lifters. Additionally, it emphasizes the vital function of the sternum strap in evenly distributing the backpack’s weight to enhance comfort.
Initial Backpack Setup:
- Add a little weight to simulate real-life conditions.
- Lift onto your back carefully, potentially with assistance for heavier packs.
Adjustment Steps:
- Torso Length: Adjust the harness to fit your back length. A good fit leaves no gap between your back and the pack.
- Hip Belt: Fasten and tighten over the pelvis for even weight distribution, crucial for comfort and stability.
- Harness Straps: Pull downwards for a snug fit, ensuring no restriction around the collarbone and chest area.
- Load Lifters: Adjust to a 45-degree angle for optimal weight distribution.
- Sternum Strap: Fasten across the chest to avoid pressure on nerves and blood vessels.
Extended Fit (EF) Packs: Designed for larger body sizes, providing the same performance with:
- Longer hip belt padding for comfort.
- Repositioned pockets for accessibility.
- Extended shoulder straps and sternum straps for better fit.
Women’s-Specific Fit: Tailored designs for women, with shorter torso lengths and curved harnesses for a more natural fit around the hips. Indeed, we have rated and ranked the Osprey Raven as one of the top 5 in our Best Hydration Packs list!
Specialized Fits for Activities:
- Mountain Biking: Ensuring the pack is snug around the shoulders with no gaps.
- Trail Running: A fit that anchors to the rib cage to prevent bouncing, with adjustable chest and side straps for stability and comfort.
This guide highlights Osprey’s commitment to providing a proper fit for all body types and activities, ensuring comfort, efficiency, and safety in outdoor pursuits.
Keep pedaling and stay hydrated, fellow cyclists! May your trails be adventurous and your hydration pack perfectly adjusted. Happy riding!
John