Rolling and Recording: A Guide to Attaching a Camera to Your Road Helmet for Epic Cycling Journeys
Key Point Summary of Attaching a Camera to Your Road Helmet:
- Choosing the Best Helmet Camera: Factors to consider for capturing quality footage on road rides.
- Attaching the Camera Securely to Your Helmet: Tips for a stable and optimal camera setup.
- Creating Compelling Cycling Vlogs: How to record engaging content during your road rides.
As a master cyclist who has spent years racing and riding across various disciplines, including mountain bikes, gravel bikes, and cyclocross, I’ve learned the ins and outs of documenting my rides. Now, I want to share with you, especially if you’re a beginner or mid-level cyclist, how to effectively attach a camera to your road helmet, so you can capture and share your cycling adventures.
Choosing the Best Helmet Camera
The first step to recording your road rides is picking the right helmet camera. Here’s what to look for:
- Video Quality: A camera that records in at least 1080p is ideal for clear, crisp footage. A higher resolution like 4K is a bonus but remember, it requires more storage.
- Stabilization: Road rides can be fast and bumpy. A camera with good stabilization ensures smooth footage.
- Weight and Size: Opt for a lightweight and compact camera to maintain helmet balance and comfort.
- Battery Life: Long battery life is crucial for longer rides. Nothing’s worse than your camera dying midway through a great ride.
Attaching the Camera Securely to Your Helmet
Once you’ve got the camera, attaching it correctly is crucial:
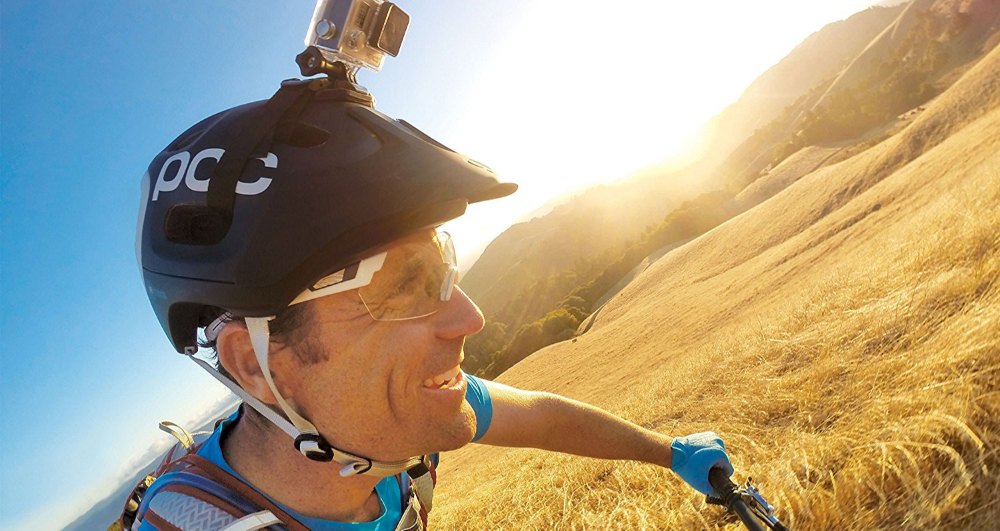
- Mount Placement: The best spot is usually the top front of your helmet. It should be centered for balance and to get a good view of the road ahead.
- Secure Attachment: Use the mount that comes with your camera. Make sure it’s tightly fixed to your helmet but doesn’t compromise the helmet’s structure.
- Angle Adjustment: Aim the camera so it captures the road ahead and a bit of your bike to give viewers a sense of being on the ride.
Creating Compelling Cycling Vlogs
Capturing footage is just the start; making engaging content is the key:
- Plan Your Shots: Think about what aspects of your ride you want to highlight – is it the speed, the scenery, or the camaraderie among fellow cyclists?
- Narrate Your Journey: Adding commentary can make your vlogs relatable and more interesting. Share your thoughts, tips, or simply what you’re seeing.
- Edit for Engagement: Good editing can significantly enhance your vlogs. Keep your content tight and focused on the most interesting parts of your rides.
From personal experience, attaching a camera to my helmet has transformed my rides into stories I can share. Whether it’s capturing the exhilarating speed of a descent or the beauty of a sunrise over the hills, these vlogs create a fantastic platform to connect with fellow cycling enthusiasts.
For mounting cameras on road helmets, several great options stand out in 2024:
- GoPro Hero 4 Session: Known for its compact size and simplicity, it’s lightweight and offers good video quality with dual microphones to reduce wind noise.
- Apeman A80: This budget-friendly camera offers near 4K video recording and is versatile in terms of mounting options.
- GoPro Hero 8: Offers elegant design, great stabilization (Hypersmooth 2.0), and useful presets for easy operation.
- Garmin VIRB 360: Takes cycling footage to the next level with 360-degree video capability and excellent connectivity features.
- GoPro Max: A combination of GoPro Hero and Virb features, providing high-quality video with the flexibility of 360-degree recording.
These cameras offer a range of features suitable for different needs, from budget-friendly options to advanced 360-degree recording capabilities.
FAQ
Can we mount camera on helmet?
Yes! You can mount a camera on a helmet. Many cyclists use helmet-mounted cameras to record their rides, as it provide a first-person view of the journey. Helmet mounts are typically designed to be secure and stable, ensuring the camera remains in place during the ride. Check out this amazing YouTube video from Walt Does Bikes!
Are helmet mounted cameras safe?
Yes! Helmet-mounted cameras are generally considered safe if they are properly and securely attached. However, it’s important to ensure that the camera and its mount do not compromise the helmet’s structural integrity or safety features, and they should not protrude excessively to minimize any risk in the event of a fall.
Where is the best place to mount a camera on a helmet?
The best place to mount a camera on a helmet is typically on the top front, centered for balance. This position offers a clear, unobstructed view and aligns with your line of sight, providing a realistic perspective of your ride. It’s important to ensure the mount is secure and the camera’s angle is adjusted to capture the desired view without compromising safety or helmet functionality.
The goal is not just to record but to share an experience. With the right camera setup and a bit of creativity, your road cycling vlogs can inspire, entertain, and maybe even educate others in the cycling community.
Happy filming and safe riding!
John